Row model settings and maintenance
Settings
In the chart of account maintenance, move on to the row model’s tab, to specify its settings. Press Settings -button. The settings menu contains all defined row models, and the views made from each, if any. Both settings are defined separately.
Settings menu contains all row models, for example T1 Profit and loss statement. If the model has any Views, they are displayed after the model, T1 View 1, T1 View 2, etc. The view settings are explained in more detail in the chapter View settings.
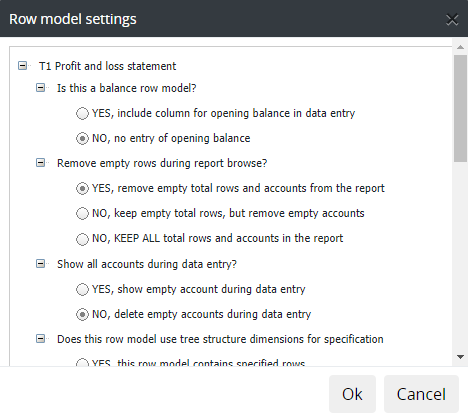
Define settings:
Row model’s type: balance or normal row model
YES -includes opening balance for data entry. Selection separates balance report from p/l row model.
NO -model does not include opening balance (default).
Remove empty sum rows during browsing ?
YES - empty sum rows are removed
NO - empty sum rows are not removed, but empty accounts are removed
NO keep all -all sum rows and accounts -also empty- are shown while browsing.
Show all accounts during data entry?
YES -display empty accounts during data entry
NO -empty accounts are not displayed in entry
Note
When moving on entry, which is empty (no data yet), all accounts are displayed, even if NO -empty accounts are not displayed in entry, is selected. The rule comes in force, after the first entry made is saved, and when re-entered the entry.
Row model calculation rules for the forecast
YES -no general instructions is available
NO -default
Dimensions limitations

Row model uses dimensions for specification -possible only for row model, not for Views. Function allows to extract data to the model, from selected unit’s row model. Additionally, any dimensions can be used to specify extraction further.
YES -model contains specified rows
NO -this is a normal row model (default)
Example:
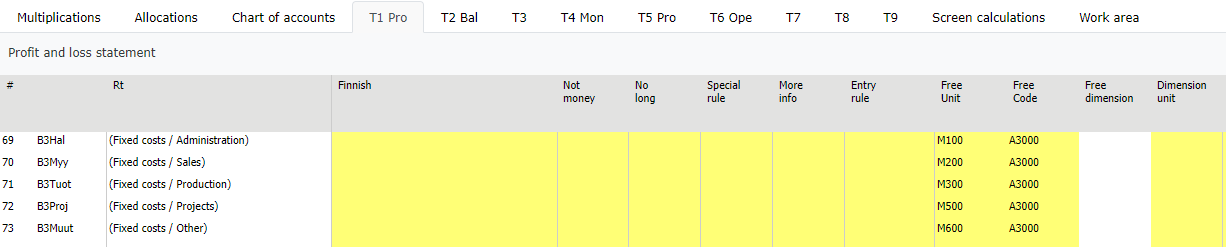
Extract gross margin report’s fixed costs (A3000) of: Admin (M100), Sales (M200), Production (M300), Projects (M500) and other (M600), to the P/L row model.
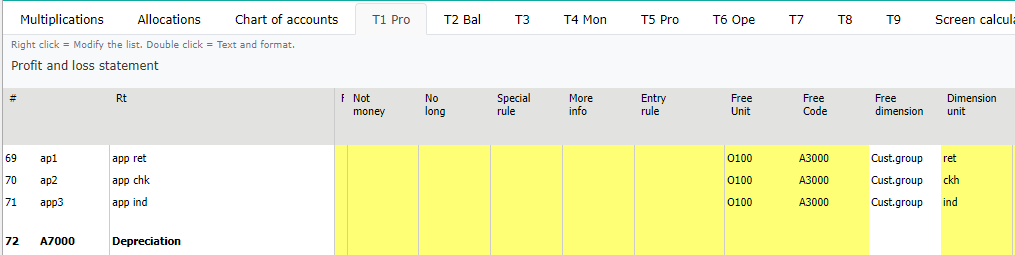
Option YES -model contains specified rows, is selected for the P/L row model. New columns are added to the model: Free Unit, Free code, Freedimension and Dimension unit. To enter value to the column Free dimension manually is blocked. Enter the value, by using right mouse menu.mouse menu.
Add corresponding rows to the P/L row model, into which data is extracted to. Use unique sum row codes.
Use right mouse menu to choose from where the data is fetched, for each row. Select unit and the source row. In the example row, unit Admin M100 and source A3000 gross margin report’s fixed costs is selected.
It is possible to extract data within the same row model.
If dimensions are in use, it is possible to specify data extraction by choosing dimension and its level to the row.
Note
Data entry is not allowed in the row model using specified rows, or in the View, which contains specified rows. I.e. View contains rows with free unit, free code columns.
Save
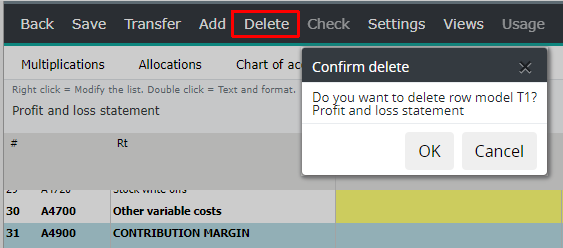
Save changes. To exit maintenance choose: Back | Yes “comment”, shown in the log | OK
In order to get extracted rows to the P/L report, run all reports.
Note
Settings can be changed only for row models and Views. Not for chart of accounts.
Change the row model’s name
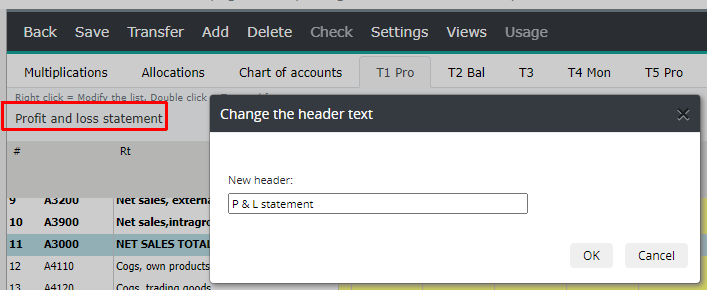
Move on to row model tab. In the upper left corner, double-click the current name “Profit and loss”. Change the name. This changes the name of the row model tab, at the same time.
Note
If the name of the row model or View is changed, then user rights has to be saved. See chapter: Users. Saving will update the changed names.
The scheduled report run (run normally every night), will save all user rights automatically.
Text and modifications
The modifications defined here, also appear in row model’s browsing.The text can also edit in the chart of accounts. Double-click the row text:
row models/chart of accounts text
row lines
row colors
row bolding
decimals used
forced page-break for the row in printing: Page(s) is set to its own tab, if printed or transferred to Excel.
Row text width
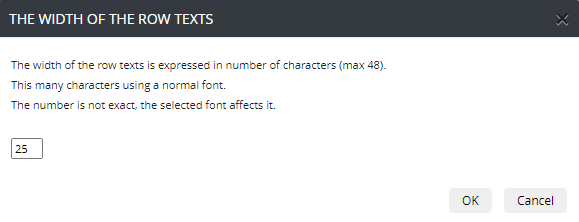
Modify the width of a row model’s row text, shown in report browsing. Right click the row text, and choose The width of the row texts. Enter a new value, and press OK. The maximum length is 48 characters. Please notice, that also the chosen font has an effect on the text’s width.
Marking the code
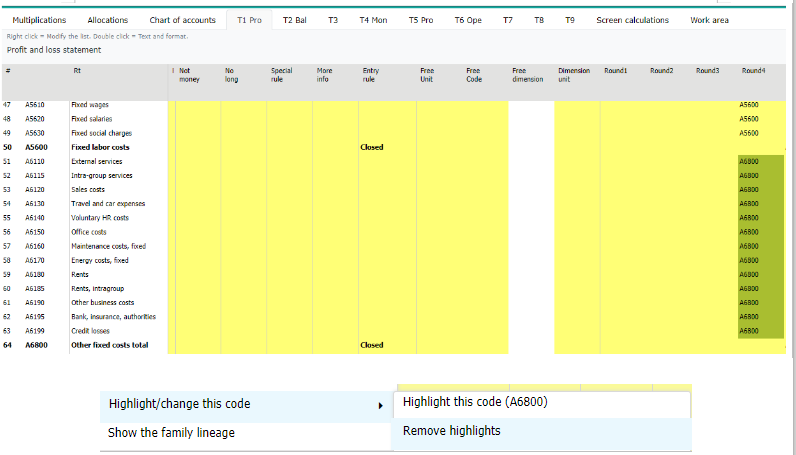
Function used in the row model, to highlight chosen row’s code -highlight steerings in the model. If the selection is made to the accounts sum row (not sum of sum row), the highlighted rows are shown in the chart of accounts; accounts steered to the sum row, are being marked.
Choose Highlight | Highlight this code.
Remove the marking from the same menu Remove highlights
Change the code
In the row model, to change selected code, either all the code where it exists, or only for the current row model.
Enter a new code, press OK

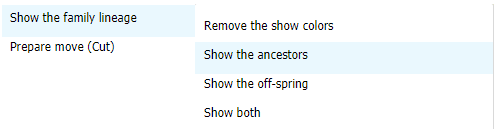
Show the family lineage
Show the family lineage | Show the ancestors check how this row is being build up.
Show the family lineage | Show the offspring -check where this row leads in to.
Show both -both ancestors and offspring is marked.
Remove the show colors -removes color codes.