Add new column model
The column model maintenance will open automatically in to the Analysis –tab. The tab contains all defined column models used in analysis reports.
Add new column model
In the example, new model is created, and existing columns are connected to it. In the next chapter is explained how to create new columns.
Add new column model and attach existing columns to it.
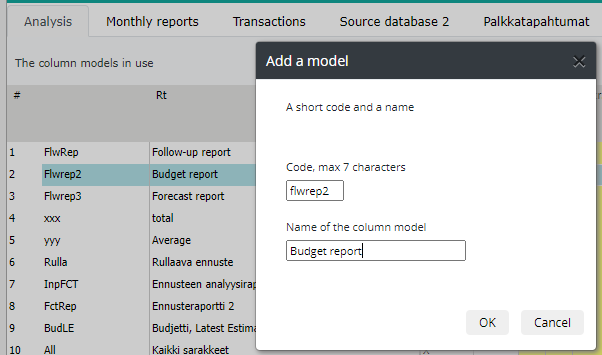
Select the desired location from the column model list, and right click the row text (Model name).
The column models in browsing are dispayed in the same order as here. Choose e.g. Add above.

Define the code and name. The model (name given) is displayed in the browsing, at the analysis column model list.
Note
Do not use any special characters in the code’s name. For example: & # ? _ : or space(bar)
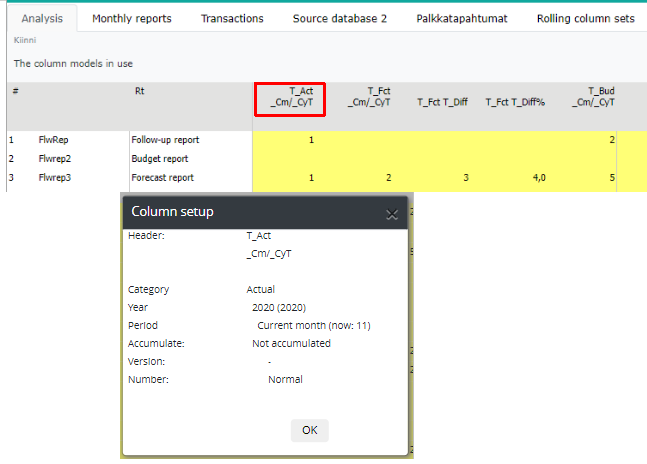
Select the columns to be attached to the model by entering a mark 1, in the first column, mark 2 in the second, etc. The numbers will also define the order of the columns shown in the report: 1, is the first, 2, the second etc.
By right clicking the column header it is possible to browse the column’s setup -from where the data is fetched to he column.
The Variables -button displays list of the variables, which can be used in column headers. Close the list by choosing other tab, for example Analysis tab.

Monthly columns
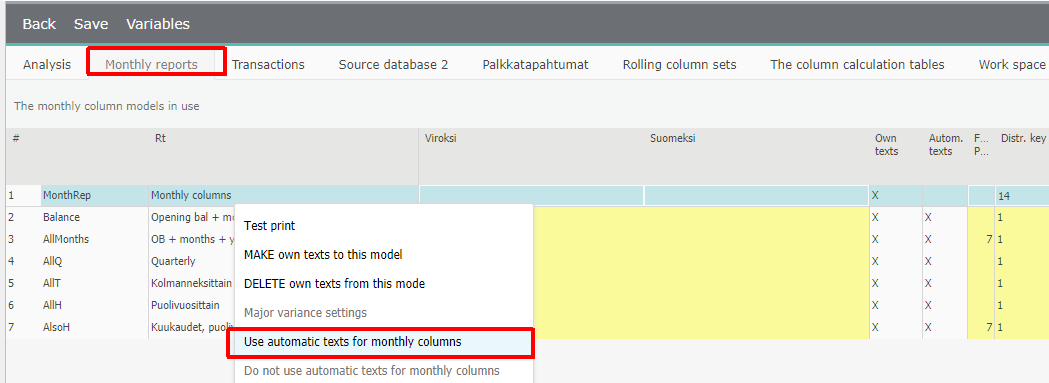
In the same way, add new column models to the monthly reports, and choose months to the column model.
Note
Please notice, when defining monthly reports, it is possible to utilize automatic texts for monthly columns. If used, the period is added to the header automatically.
If automatic text is not used, then the year / monhtly headers have to be maintained manually, when the fiscal year is changed.
Column model’s major variance settings
For the column model, it is possible to define “major variance settings”, then defined major variances are searched from the columns selected to the model.
In the example, a new column model using major variance settings is defined. Right click the model list, and choose Major variance settings
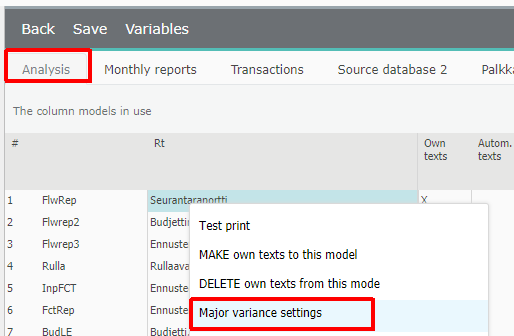
Mark the tickbox: “Variance reporting is active in this column model”. Choose the time period, variance (euro or %), and define the limitation. Press OK.

Next, select columns to the model. How to choose columns for the model, is explained in the chapter: Add new column.
In the example, columns from the Actual and Budget, and their difference columns, is selected.
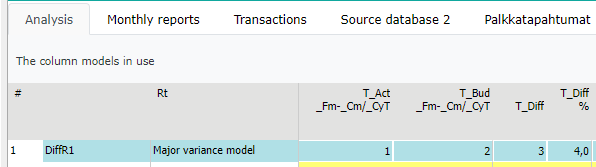
The column model is located in the browsing: Columns | Column model for analysis reports | “Major variance column model”
Note
It is possible to use major variance column model in entry also
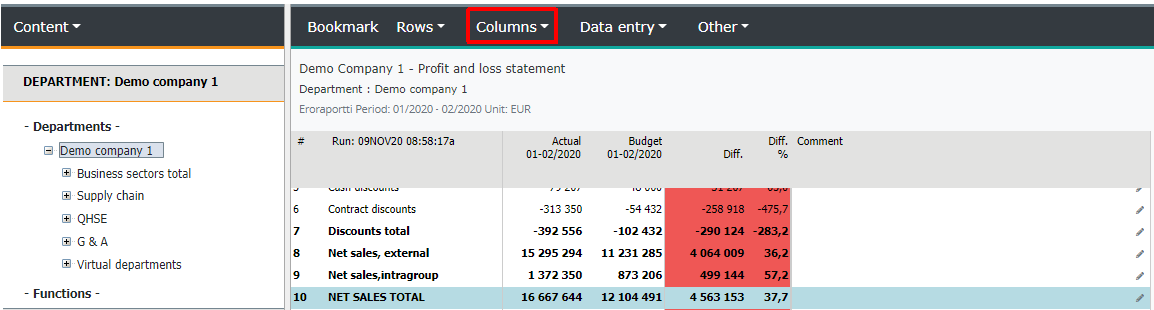
Each row in the variance model can be commented. The commenting window opens by pressing the “pen icon” at the end of each row. See also how to write General comments.
Note
Comments written to major variance column model, are displayed only in the time period and cost center level, at which they are written.
Add column using select and sort function
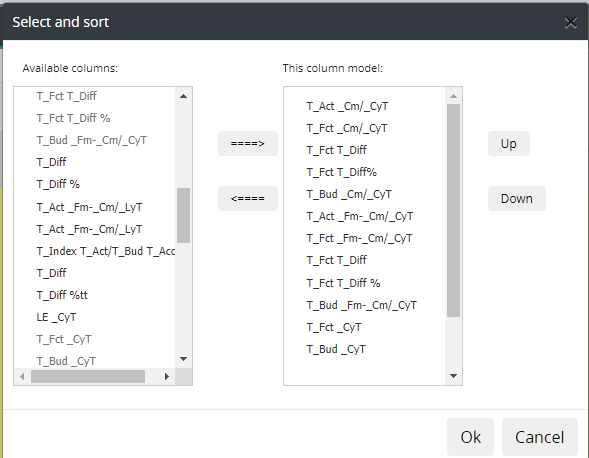
Other way to add columns, is to use Select and sort function. Right click column model’s row text, and choose Select and sort
Columns in use
Window with two frames is opened. In the left frame, is the list of available columns, columns which can be added to the model. Other frame displays columns added to the model already, if any.
Function can be used to add columns to the empty model also.
Column model
If creating a new model, the right frame is empty.
In the left frame, to add a new column to column model, click column once, andmove it to the right frame -i.e. add a column to this model -by pressing the arrow pointing right. Transfer several columns at the same time, by holding keyboard’s ctrl -button, while marking the columns. Press the arrow pointing right.
In the right frame, the first column in the list, will also be the first column in the report, next second column etc. To change this order, click column once and move it to the desired location, by using Up or Down – buttons
To remove a column from the column model, click it once in the right frame, and move it back to the left frame, by pressing arrow pointing left.
After the columns have been added to the model, press OK.
Save
Save changes made, either by pressing Save button – changes made are saved without leaving maintenance. To exit the maintenance, choose Back | Save changes. Next the changes can be commented on the next window. Comment is saved to the log: Maintenance | Other | Log
Column model in browsing
Browse analysis column model. Select Columns | Column models for analysis reports | “column model”.
Column model texts
Note
The System Admin has to define column model header’s and modifications for all column models, which differ from the default.
Right click column model’s row text. Choose MAKE own texts to this model. The workspace tab, with only the columns of the chosen column model, is displayed.
Right click the column header that is being edited. Choose Modify.
modify higher / lower header text
bolding
width
shown decimals
After changes are made , save them by pressing OK. Ignore changes choose Cancel.
After changes made for the column, press Save button to update all changes made.
The changes affect only the selected column model.
Exit from the column maintenance or move on to the other tab.
Delete own texts
To remove the own texts made, right click the model which has own texts defined. Choose DELETE own text from this model. This delete all modification made to the model, for example, for the column width defined.
Note
New columns are being calculated during report run. If the column is empty, run the reports.
The above describes how to add ready-made columns to the column model. Next, how to add new columns is explained.