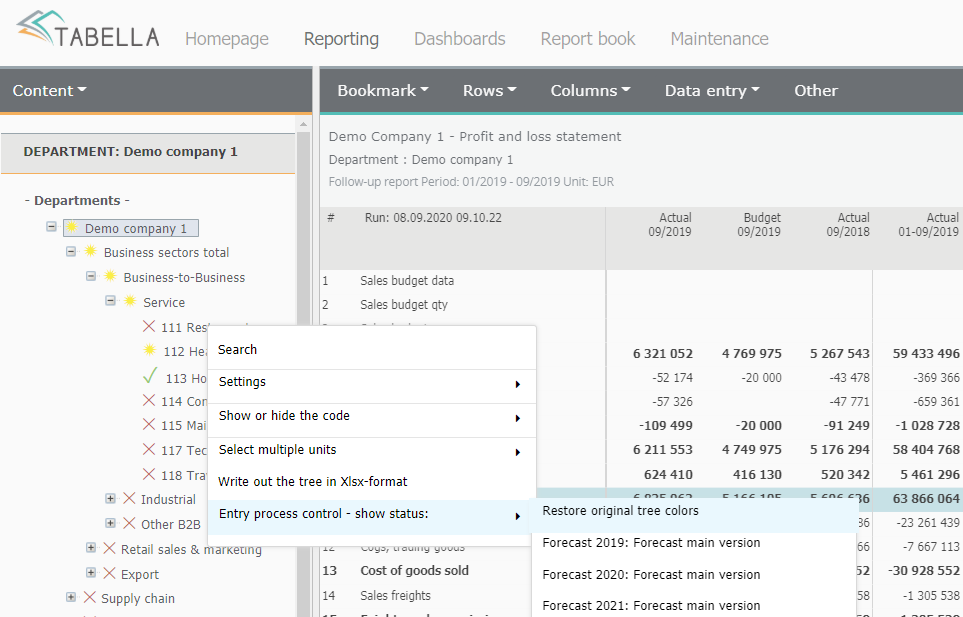
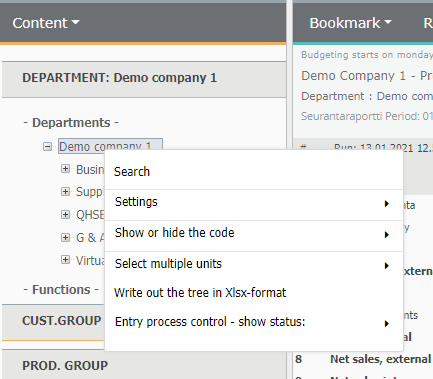
Tree structure functions
Tree structure right mouse menu functions: Search, Settings, Show/Hide code, Multiple units selection, Xlsx printing and Entry process status browsing.
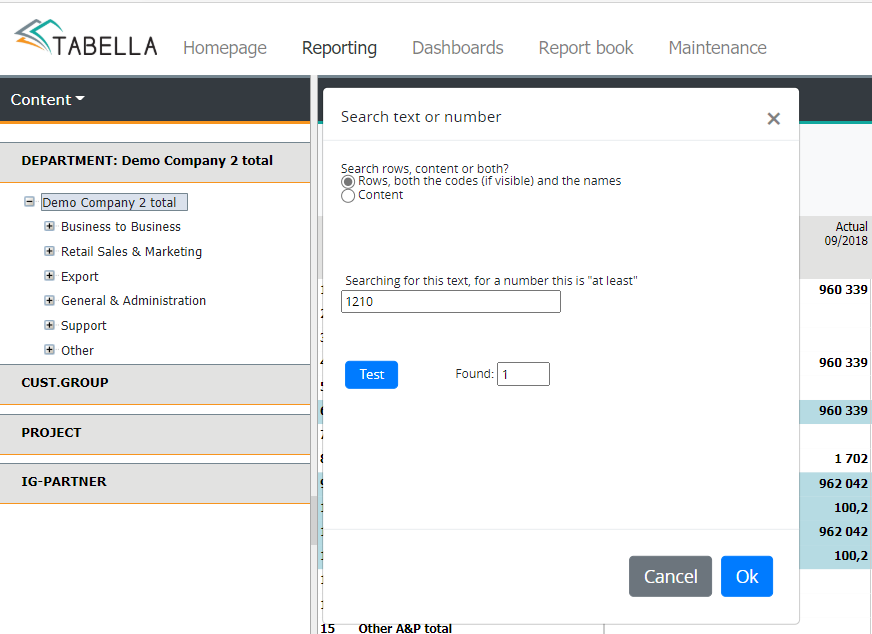
Search
Use to search, for example, department from the tree structure. Search is done from the chosen tree level downwards. In the example the code “1210” is searched.
Pressing Test -button, will show how many times searched string is found. Start the search by pressing OK. The cursor will highlight the first code found, which meets the search criteria. If there are more than one match, others are opened, and highlighted in the tree structures.
Settings
Use settings to get different viewpoint to a report.

Select Settings | Change the settings. The settings for the main hierachy (e.g. department) and other dimensions has each their own settings menu.
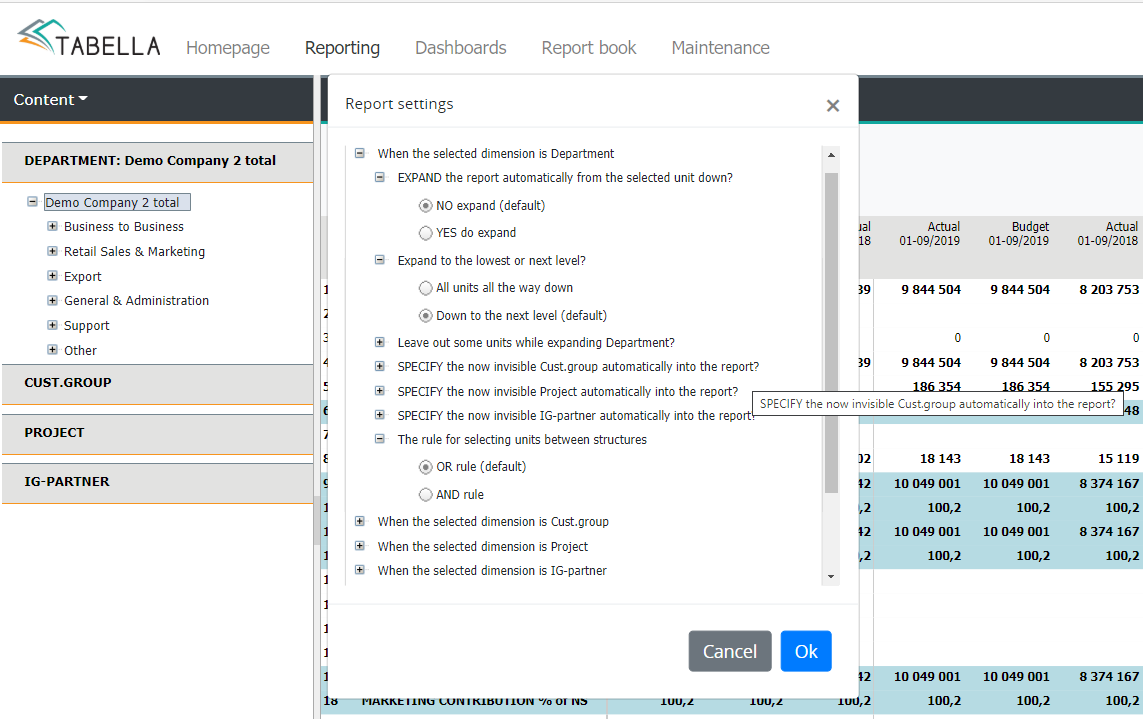
The report follows the currently selected tree level downwards.
Example: At the Demo company 2 level. Expand, Yes do expand | Down to the next level | Do not leave anything out. Dimensions are not specified.
The rule for selecting units between structures
Note
OR / AND -selection has an effect on Multiple unit selection report -explained later in this chapter.
For instance, if there are two separate hierarchies A (Activities) and B (Juridical), of which the units are picked up.
OR -all units from A and B is selected. This is default
AND -units found in both structures A and B, is displayed.
The selection affects the Multiple unit selection report explained later in this chapter.
Save own settings
To save settings made, choose Saving | Save these settings as your own. These settings will remain in force, until new settings are saved, or current settings are restored.
Restore the settings
To restore orginal report choose Restore the settings. If the report is empty, choose level from the tree strucure.
Common settings
The System Admin is able to save settings to the common library. These settings will be in force for all users, until removed. Choose Saving | Save these settings as common settings. Remove common settings by choosing Saving | Remove common settings. The removal comes into force during next log in.
Saved common settings applies to all companies. The company’s dimensions affects scope of the saved settings. Therefore it is recommended to use the widest dimension selection, while saving common settings.” .
Note
If the report is formed by using settings menu, it disables the option Show multiple units, explained later in this chapter.
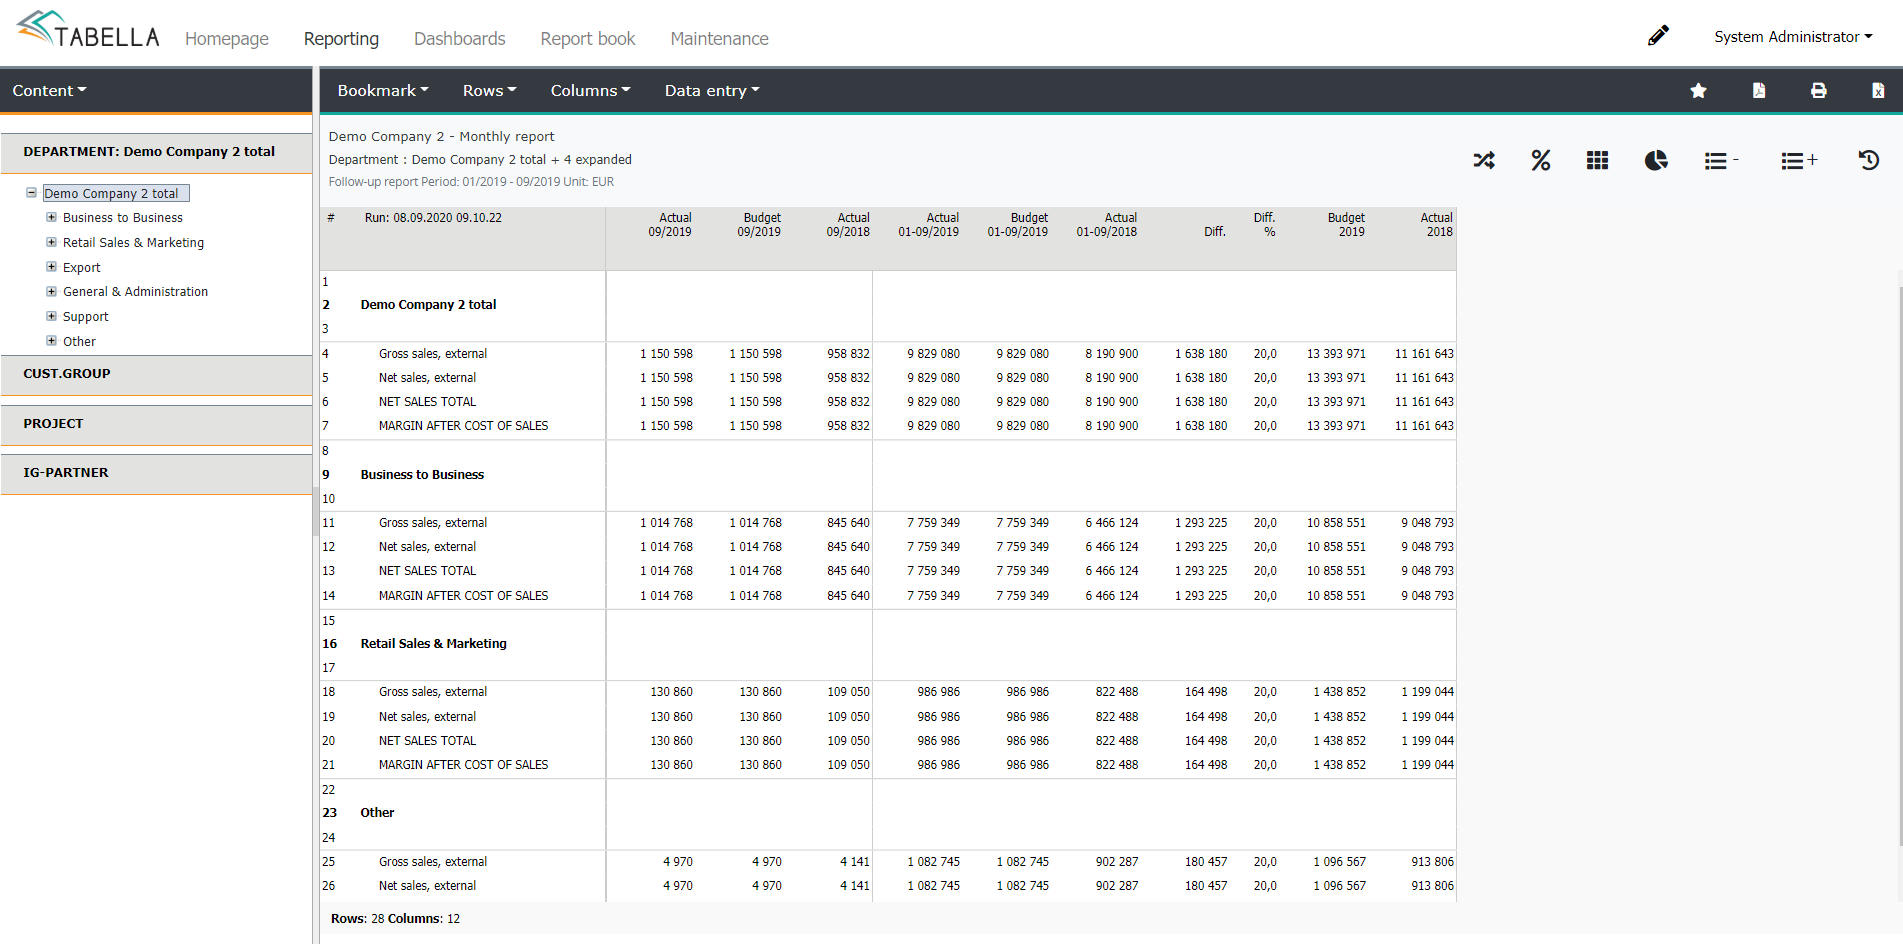
Show/Hide Code
Choose, for example, how the departments’ code in the tree structure is displayed. In the example, the code is shown in all departments’ level.

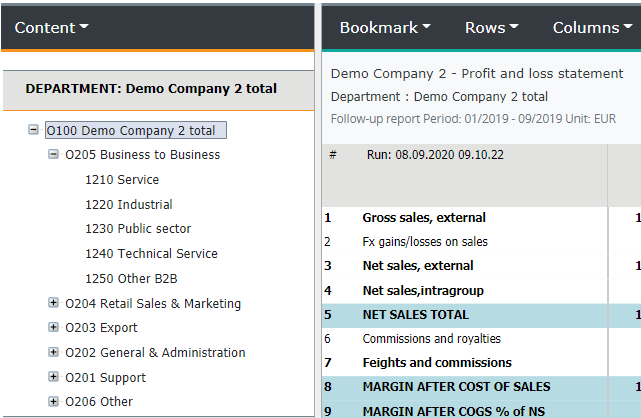
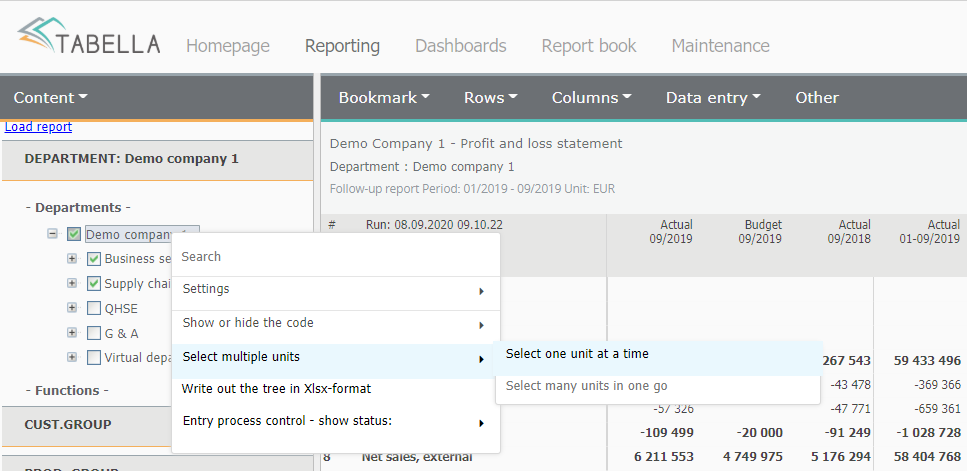
Show multiple units
Extract the summation of the units selected from the tree structure. Select Show multiple units. The outlook of the tree structure changes. Choose desired units / levels from the tree. It is possible to make selection from the another structures / dimensions also. For example, Department and Project.
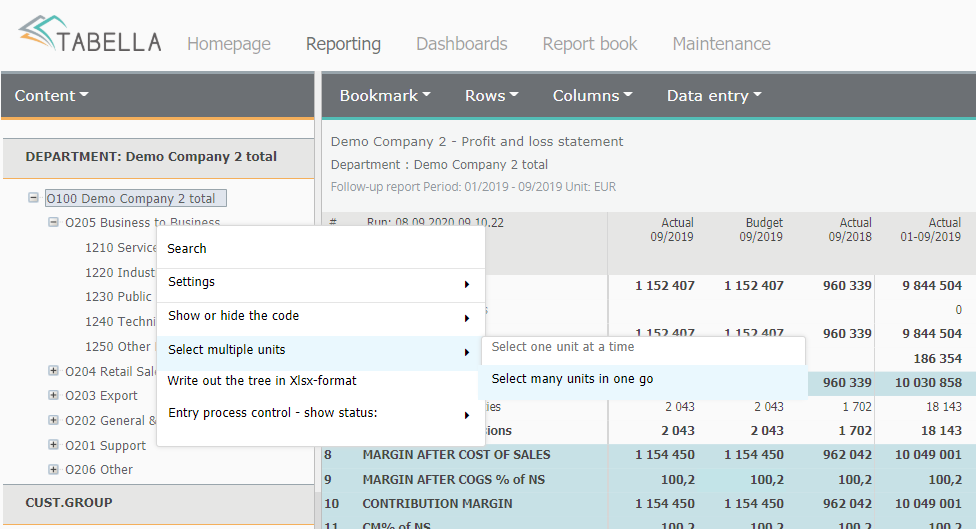
Choose desired units and press Load the report. Report will show data from the selected units.
If the selection in the structure is changed, or the row model / column model is changed, the report has to be updated by re-pressing Load report
The rule for selecting units between structures
The current selection of how the units between structures is displayed, explained above in the chapter on Settings, affects the scope of the multiple units report.
Settings menu, the rule for selecting units between structures
OR -all units from structures are selected. This is default
AND -units found in both structures A and B, is displayed.
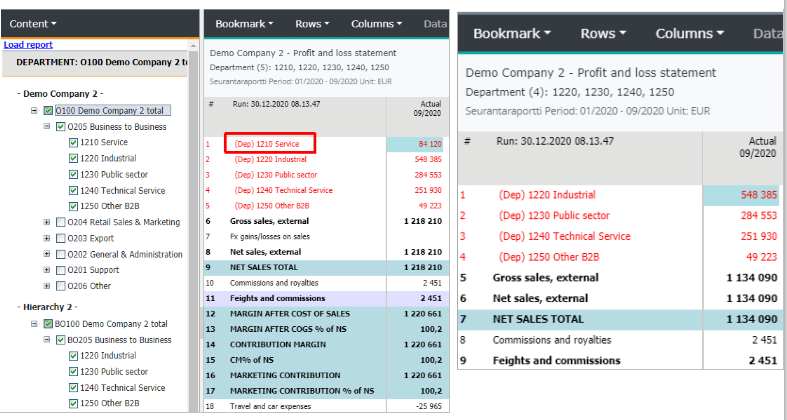
For instance, there are two separate hierarchies A and B, of which the units are being picked up. However, one department (1210) appears only in the other tree structure. The selection is made for both hierarchies Business-to-business level.
The rule OR, from the settings menu is chosen -> department 1210 is displayed in the report.
The rule AND, is chosen -> department 1210 is not displayed in the report.
Restore report
To restore the original report, use the same menu. Choose option: Select one unit at a time. Finally, select (load) a level from the tree, by clicking it. This will remove the multiple unit selection.
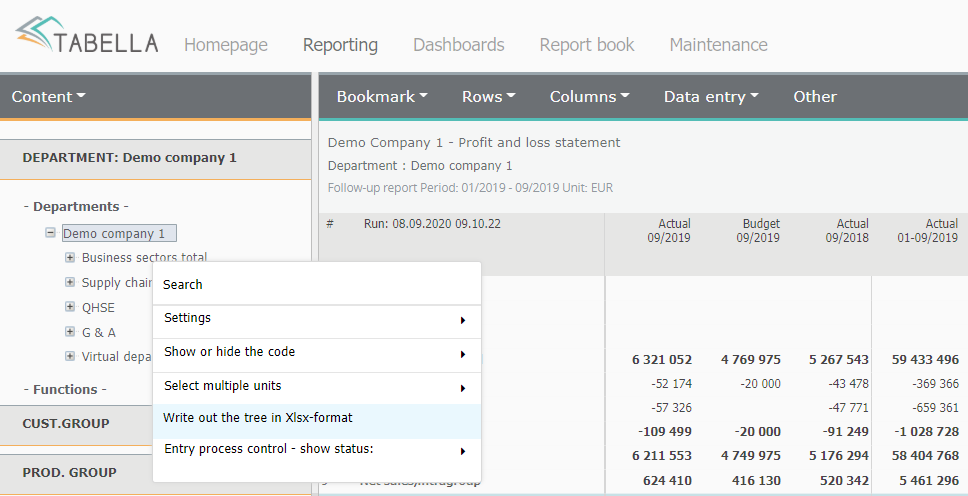
Write out the tree in XLSX -format
Load the tree structure in xlsx format. How the printing is done, depends on the web browser in use. Follow the browser’s instructions.
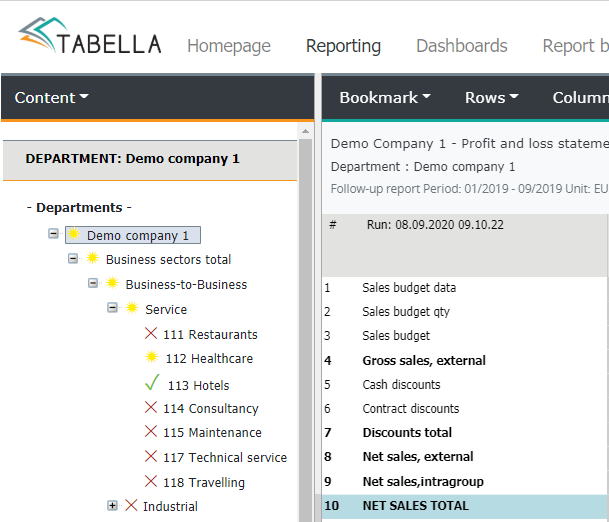
Entry process control -show entry status
If the System Admin has defined the entry process control -“traffic lights” - to be active, then it is possible to browse the current entry status for the chosen time period: budget, forecast and LRP.
Color codes indicates the current status

yellow -entry is in progress

red -entry has not started yet

green -the entry for the chosen cost center level is finished, and the entry is closed
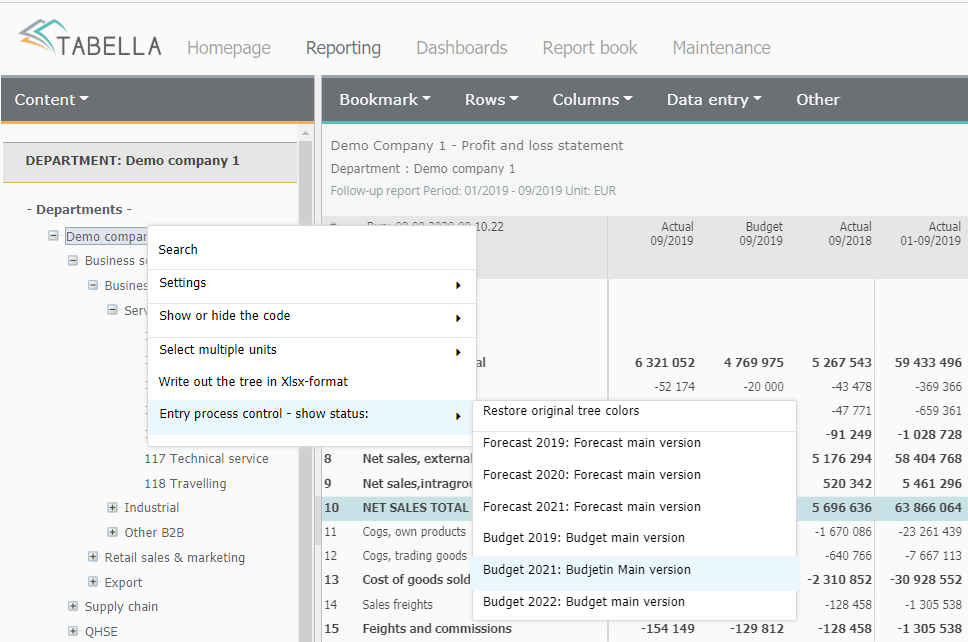
Hide the color codes
To hide the color codes, choose Restore original tree colors